Setting up E-Mail on a POP3 Client
Configuring Outlook Express
- Operating System:
Windows 95/98, 2000, ME, XP
- Application:
Outlook Express
|
 |
Steps to manually configure accounts in
Outlook Express:
- Launch Outlook Express.
- Select the Tools menu, then select Accounts.
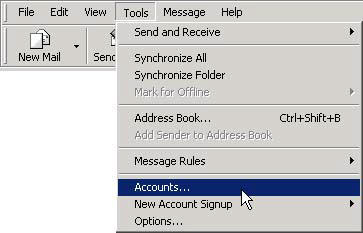
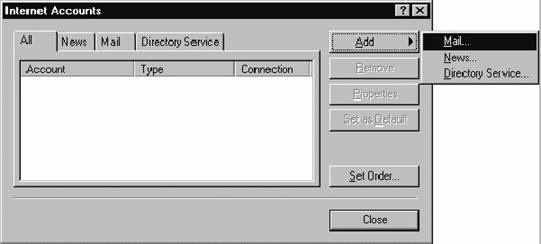
- Click the Add button and select Mail
-- Outlook Express runs a wizard to guide you through each step of
configuring Outlook Express.
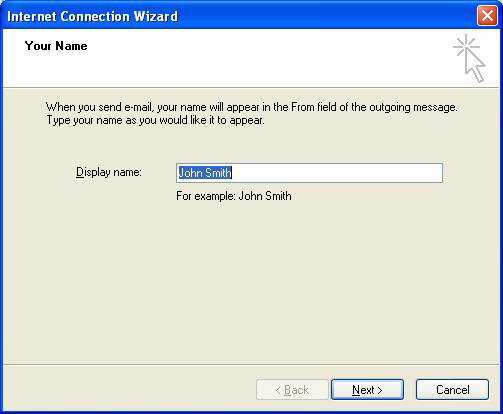
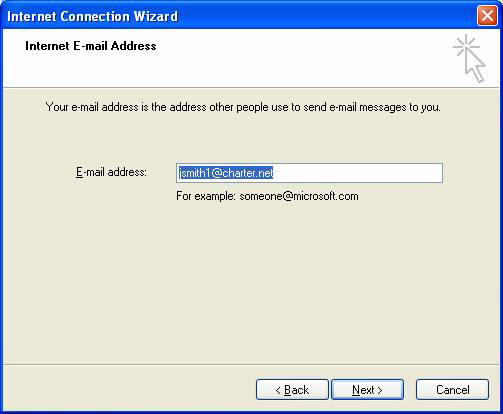
- Type your full name as you want people to
see it when they receive email from you.
- Click Next.
- Select I already have an email address that
I’d like to use if prompted.
- Type your Charter High-Speed Internet email
address.
- Click Next.
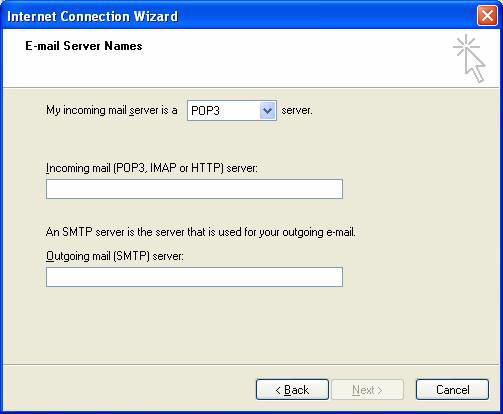
- Select POP3 from the drop-down box for your
incoming mail server.
- Type your incoming and outgoing mail server
names.
- Click Next.
- Type your account name and password - leave
the Remember password option checked. (type in "name@yourdomain.com" for the
Account name, the password.)
- Click Next.

- Click Finish to complete your internet connection
set-up.
To Finalize the Settings to your POP3
account for "sales", follow these steps:
Click on the "Tools" menu, and choose "Accounts" from the
pull down menu
Select the account "sales@yourdomain.com" in your list of
email accounts by
clicking on it. Click the "Properties" button. That will bring up a window for
the "General" Tab
Now Click on the "Servers" tab to bring up this window to
put a CheckMark next to My server requires authentication
For your Email Account to work properly,
you MUST PUT A CheckMark in the box next to
"My server requires authentication"
Then click the "Settings" Button
Select the "Use same settings as my incoming mail server"
and then click the "OK" Button.
click the "OK" Button on All Windows to close them
ADVANCE SETTINGS - Leaving a Copy of
E-mail in the Server
|
At the e-mail properties window select
the Advanced tab
-
Leave a copy
of messages on server: THIS IS NOT RECOMENDED This will cause the server not to remove
e-mails from storage once they have been downloaded to your computer. You
can check all your e-mail from your computer or from anywhere
through the web. (Use mail.yourdomain.com)
-
Remove from
server after X days: (Optional) Select to have the server
automatically remove all e-mails that are X days old. If the e-mail was
not downloaded to your computer in the time specified by X, the mail will
be lost. Please exercise caution when using this option.
-
Remove from
server when deleted from 'Deleted Items:' (Optional) This will
synchronize Outlook with the e-mail server. Select to have Outlook delete
e-mails in the server when you delete e-mails in Outlook.
Click on OK for settings to take
effect |